Since a while now, customers show an increasingly interest in data-at-rest encryption. vSphere has build-in encryption features since the 6.5 version. I wrote this post to show how Equinix SmartKey can help implementing these encryption features without buying HSM appliances yourself. Since I started working with the SmartKey product, I was surprised how easy and intuitive it was to implement vSphere VM and vSAN encryption.
So, what is an HSM? The acronym stands for ‘Hardware Security Module” and does the following: HSM is an industry term for a hardware security module, a physical device which is used for managing cryptographic keys and for performing cryptographic operations such as key generation, signing and encryption with those keys. HSMs are typically certified for internationally recognized standards such as Common Criteria or FIPS 140-2.
This post will describe the features that vSphere offers to encrypt data written to disk by the guest OS. To be on the same page here, we’re talking about data-at-rest at the VM and vSAN datastore level, of which both are transparent to the Guest OS.
History
vSphere 6.5 was the first version that supported data encryption. At first VM Encryption was added. It was with the release of vSphere 6.5.0d (vSAN 6.6) in which VMware also added data-at-rest encryption for vSAN.
It’s important to state that VM and vSAN datastore encryption are separate techniques aimed for different use-cases. The first is a storage agnostic method which changes the VM configuration to do so, while the latter is configured for a whole vSAN enabled cluster at once and does not require VM specific changes.
Encryption differences
Essentially VM and vSAN data encryption have a similar result, but are implemented in a different way. The main differences between VM versus vSAN encryption can be seen in the table below. Which of the two works the best for you is depending on your environment and requirements.
| VM Encryption | vSAN Encryption | |
| Min. Required License | vSphere Enterprise Plus | vSAN Enterprise |
| Scope | Per VM (essential files) | Per datastore (all files) |
| Storage Compatibility | Storage Agnostic | vSAN only |
| Dedup / Compr savings | No (Data is written encrypted to datastore) | Yes (Happens before encryption) |
| Requires KMS | Yes | Yes |
| KMS Keys obtained by | vCenter | Hypervisor |
| VM Agnostic | No | Yes |
| Limitations | Yes (see Caveats and Interop guide) | Yes KMS not on vSAN datastore |
SmartKey
So, how does Equinix SmartKey fit in? As can be seen in the table above, a Key Management Server (KMS) is required. To be more specific, a KMIP 1.1 compatible KMS solution is required to enable encryption in vSphere.
Especially for encrypting data, a proven and foremost compatible solution should be on top of your list. SmartKey is a SaaS based offering, based on Fortanix “Self Defending Key Management Service” (SDKMS). Fortanix SDKMS is listed in the VMware Compatibility Guide and has a VMware Ready status for both VM and vSAN encryption. The compatibility part is therefore covered.
The KMS features are just a part of the SmartKey capabilities. The product is in fact a complete HSM as a Service that delivers key and cryptographic services for onprem and public clouds. The service currently is offered in 5 regions wordwide:
- Americas (AMER)
- Asia Pacific (APAC)
- Australia (AUS)
- Europe (EU)
- United Kingdom (UK)
Besides compatibility, the availability is evenly important. SmartKey is therefore made highly available by spreading the service across 3 availability zones in every region.
To get started with encrypting your data, SmartKey offers a 30 day trail, which is literally setup within 5 minutes. The trial itself is full featured and offers:
- Unlimited keys
- Unlimited plug-ins
- 10.000 crypto operations
Basic configuration
The configuration of VM or vSAN encrypting is split in 3 parts.
- Create the application within SmartKey
- Create a KMS server in vCenter
- Configure encryption for VM’s or vSAN by
- Create VM encyption policy
- Enable vSAN encryption
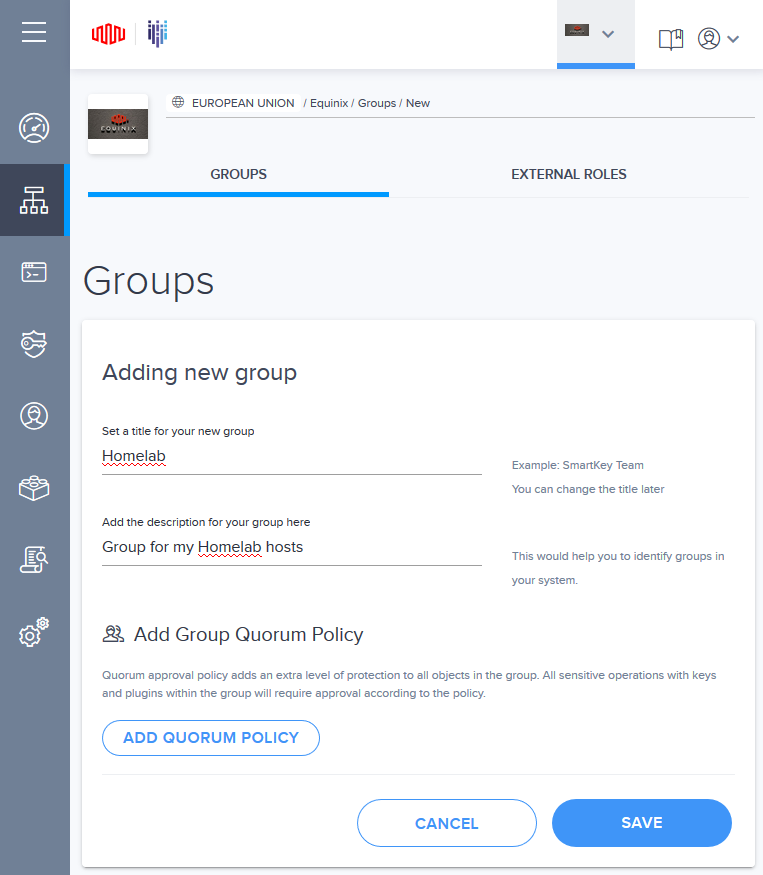
Step 1: Create SmartKey application
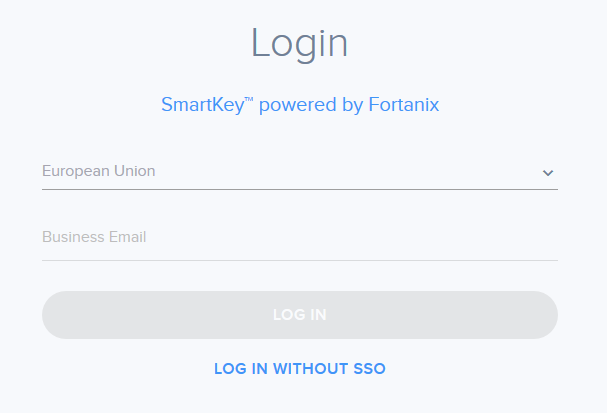
Login to the SmartKey portal in the desired region and follow the 3 steps below.
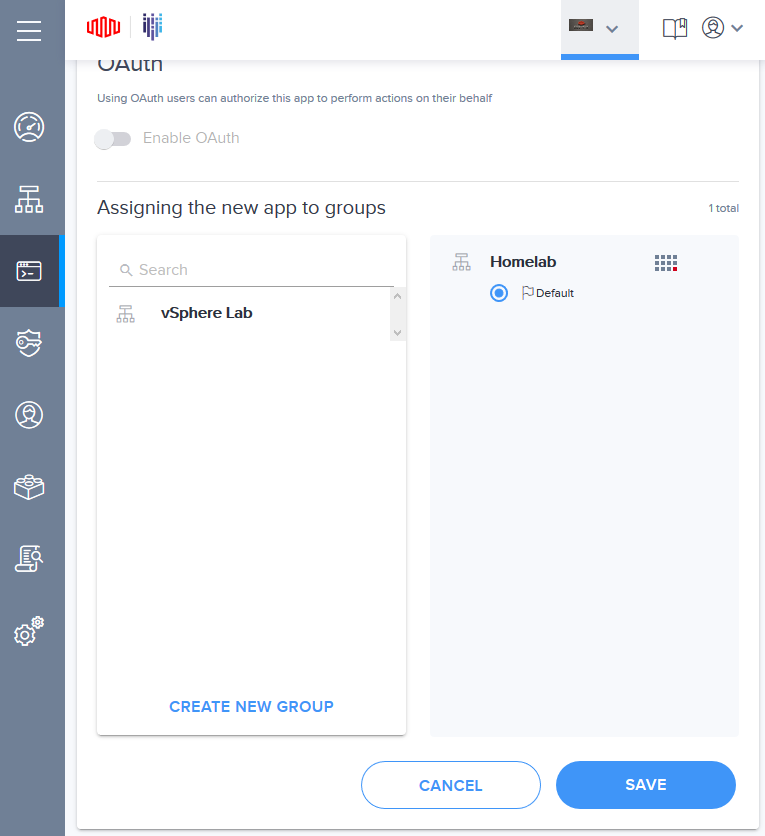
1: Create a new group, fill in the “Title” and “Description” field and save it.
2: Create a new application:
- Fill in the “App name” and select “KMIP” as protocol
- Under the “Description” section, choose the default of “Custom App” and fill in a descriptive name
- Add the app to the group created in step 1
- Leave everything else at their default values and save the new app
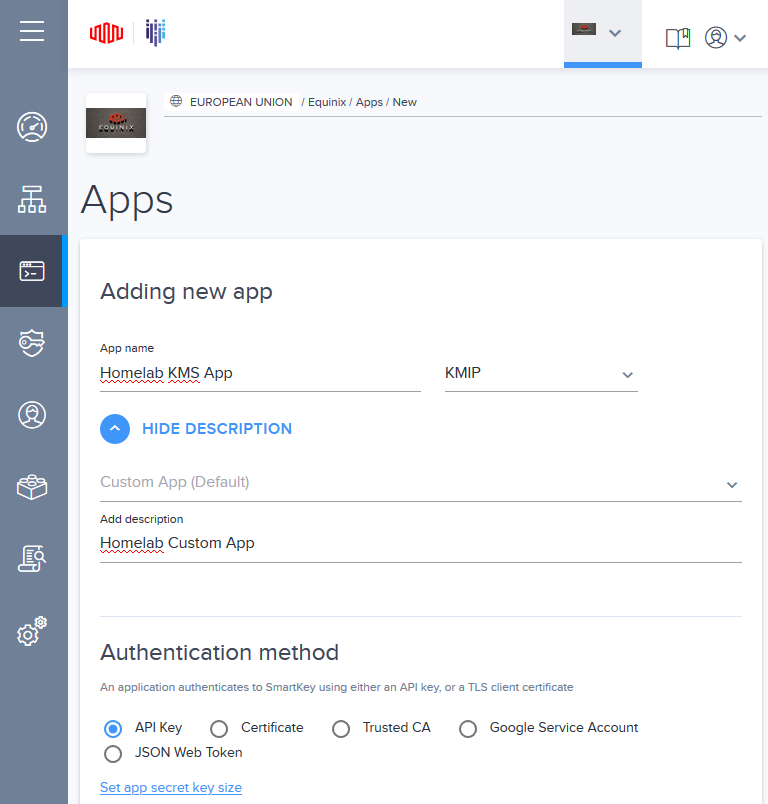
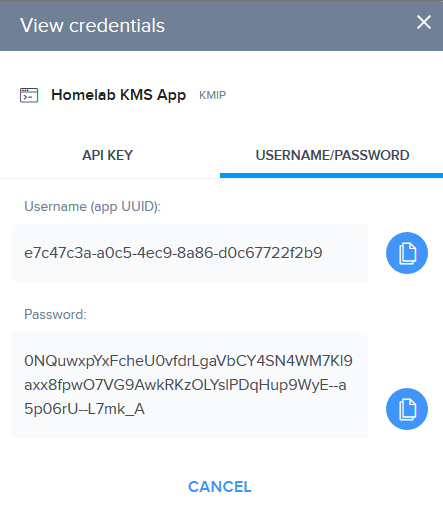
3: After the app is created, click “View Credentials” and use them in vCenter later on while adding the KMS Server.

This concludes the SmartKey configuration. Let’s go over to vSphere now.
Step 2: Create vCenter KMS Server
Before the actual encryption can be enabled, the first step is to configure the KMS Server in vCenter.
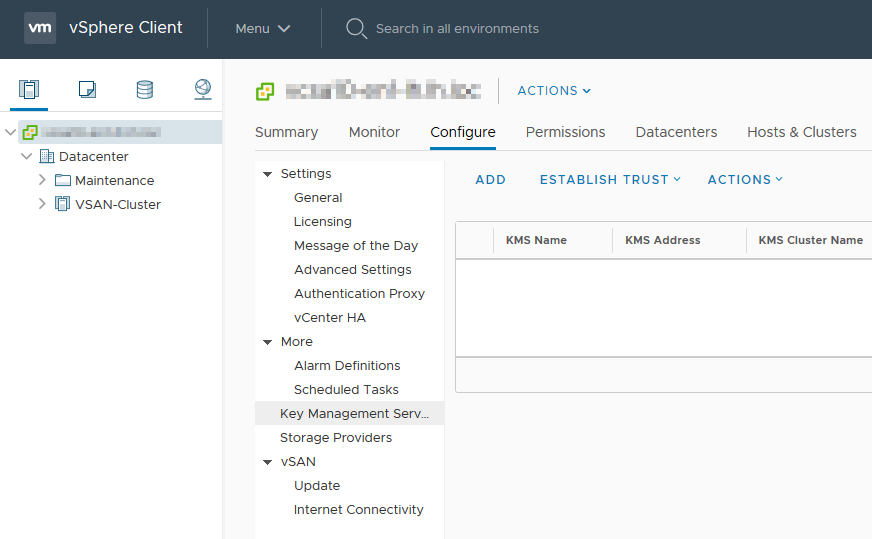
1: Login to the vCenter H5 client with admin credentials and select the vCenter object in the “Hosts and Clusters” view > “Configure” > “Key Management Servers” and select “Add”.
2: Configure the parameters and add the KMS Server to vCenter. The “Username” and “Password” are obtained from “View credentials” screen in the previous step.
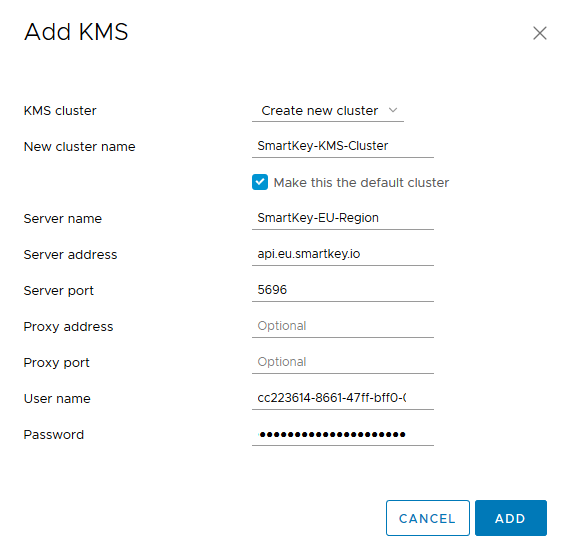
Don’t type the “Server Address” field wrong, as this will seriously impact the running vCenter. In my lab the whole GUI (H5 and Flex) frozes and a reboot was needed before I could remove it.
Also make sure the “Server Address” points to the same region you configured the SmartKey account. Else, adding the KMS Server works just fine, but no key material is exchanged later on in the process.
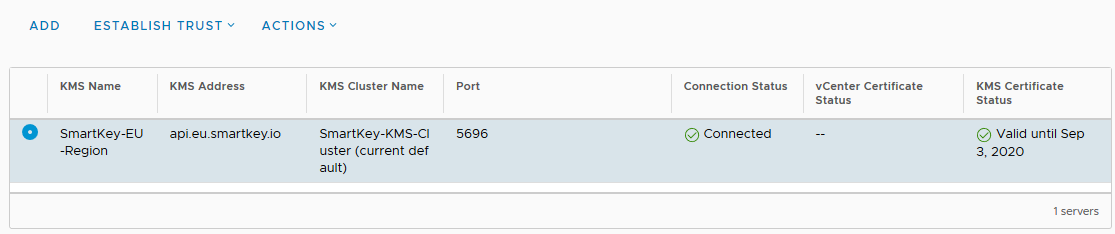
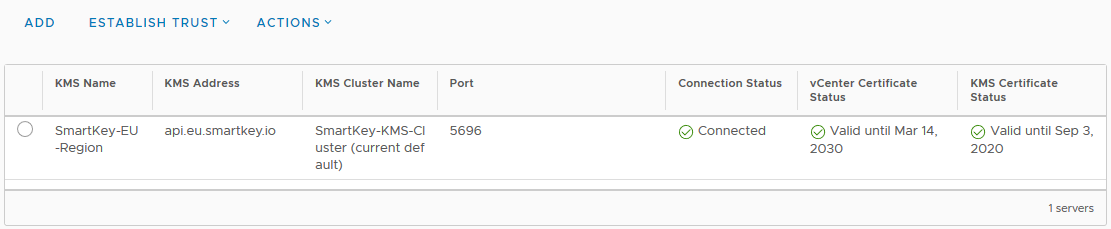
3: The KMS server is now added to vCenter and should have a status of “Connected” and a “KMS Certificate Status” of “Valid”.
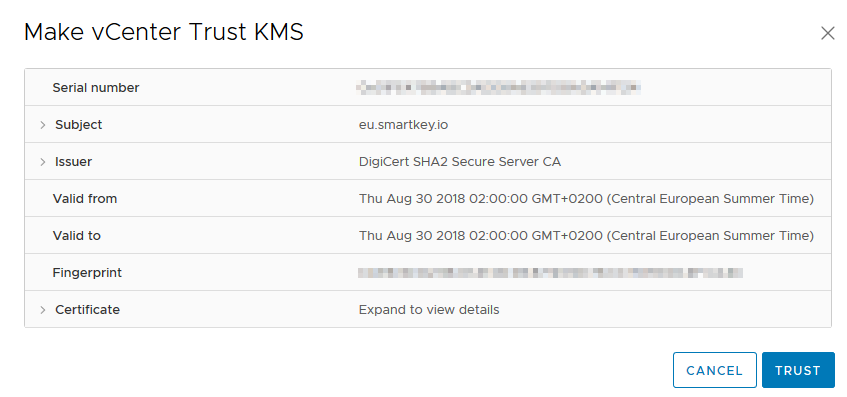
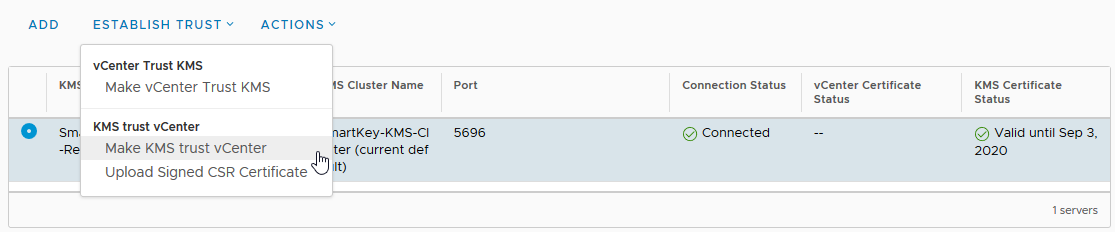
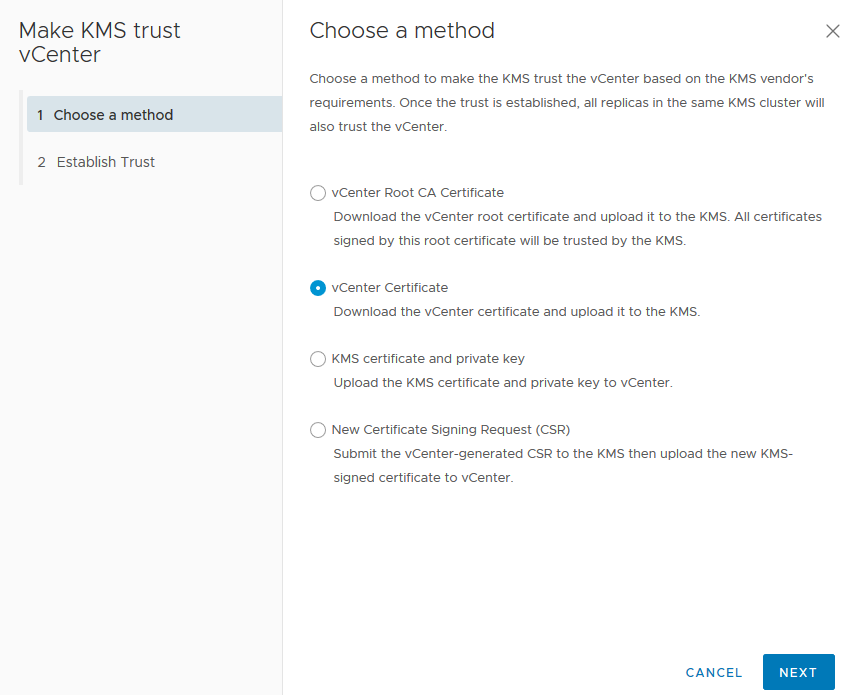
4: The last part of configuring the KMS Server in vCenter is to let the KMS Server trust vCenter. Select the new KMS Server < “Establish Trust” > “Make KMS Trust vCenter”.
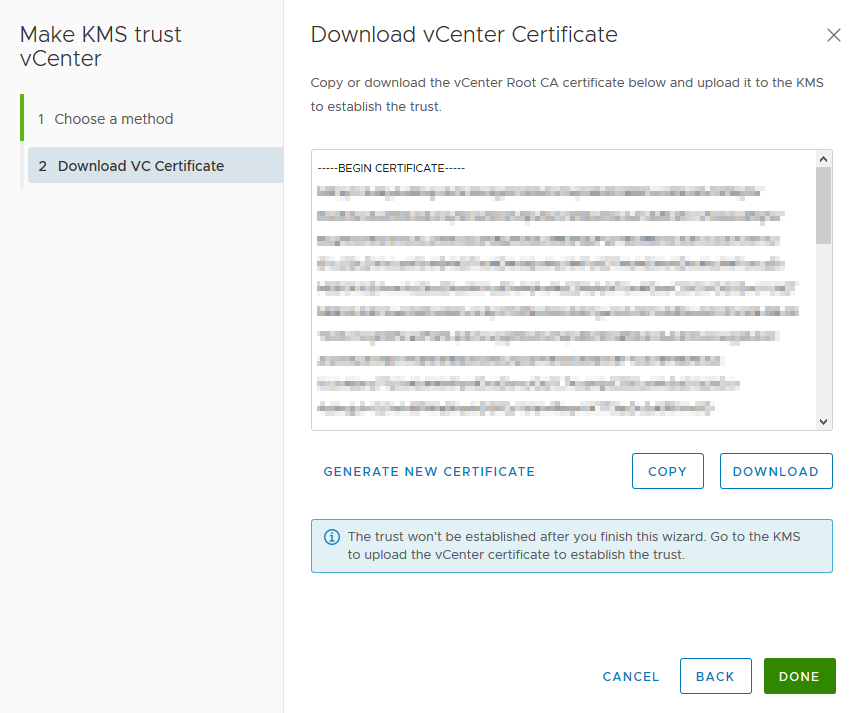
5: The KMS Server configuration is now finished. All 3 checks are Green now.
Step 3a: Configure VM Encryption
Lets perform some encryption magic now. To begin encrypting VM’s, start by configuring some new storage policies and not use the default ones. Create 2 new policies in the order mentioned below in the vCenter “Policies and Profiles” menu.
- Storage Policy Component
- VM Storage Profile
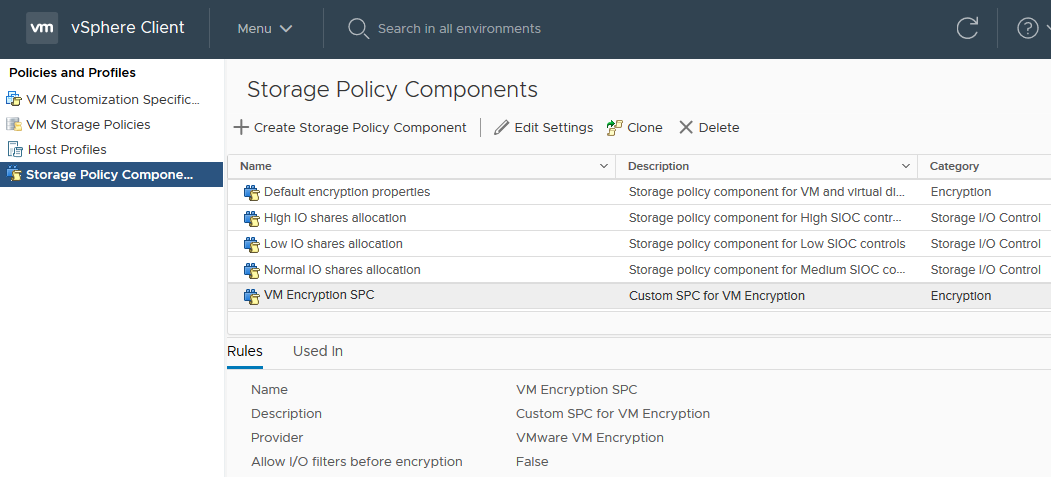
First clone the “Default encryption properties” policy and assign it a name you see fit (for example “VM Encryption SPC”) and description. The other properties can be left at their default values. The new policy should show now and have a category of “Encryption”.
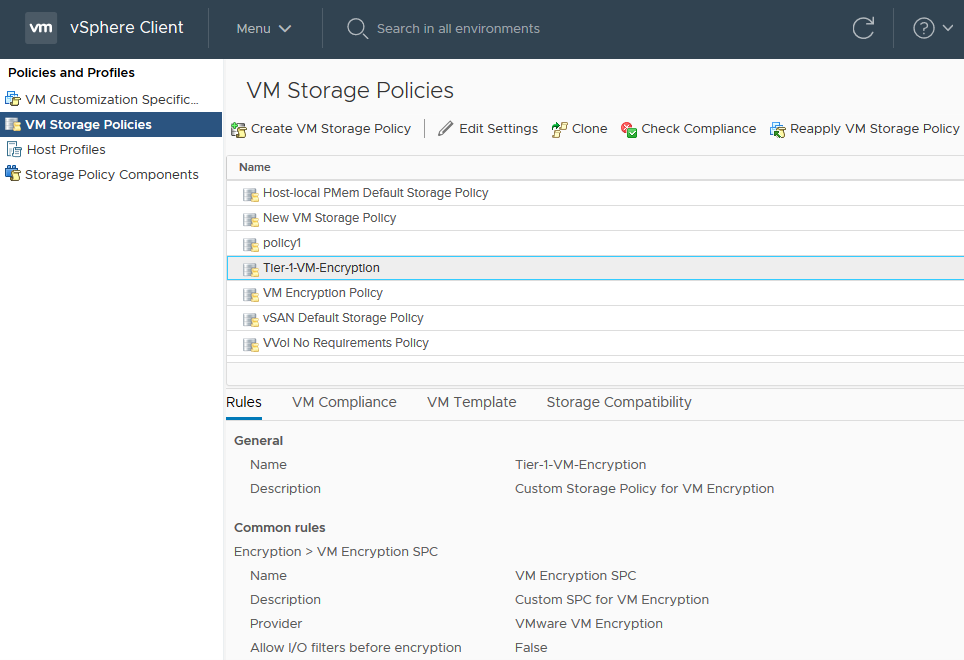
Secondly go to the “VM Storage Policies” section and clone the default “VM Encryption” policy. During the cloning wizard:
- In the first step assign a name you see fit (For example “Tier-1-VM-Encryption”) and description.
- In the third step select the previously created Storage policy component, named ” VM Encryption SPC”. The other properties can be left at their default values during the clone wizard.
Last but not least, create a new VM. In step 4 of the VM creation wizard, check the “Encrypt this virtual machine” box. This only shows the VM Storage Policies enabled for encryption and choose the newly created VM Storage Policy.
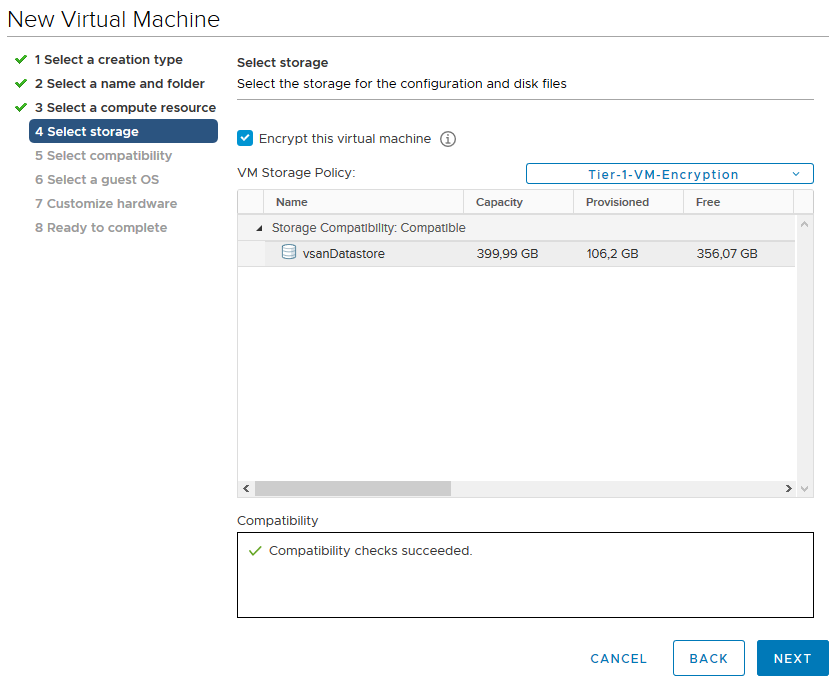
After finishing the VM creating wizard an encryption key is pulled from the KMS for this VM and the data is encrypted.
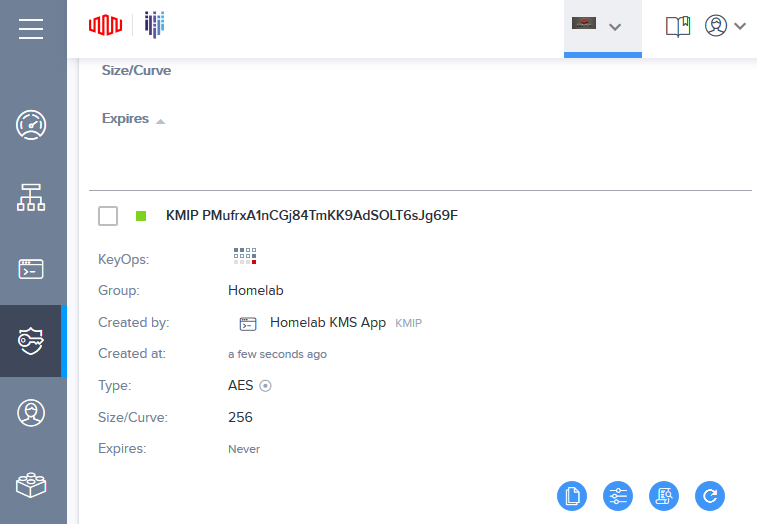

So, how does this work in general? For every encrypted VM, vCenter will request a KEK (Key Encryption Key) from the KMS and stores only the ID, not the KEK itself. The KEK is passed to every hosts in the cluster in which the encrypted VM is created. The host that runs the VM will create a unique random generated DEK (Data Encryption Key) for the VM and its disks. The DEK is stored on disk together with the encrypted data.
When a host is rebooted the KEK is requested again from the KMS via vCenter and is used to decrypt the on disk stored DEK. The DEK is used to decrypt the VM data.
Step 3b: Configure vSAN Encryption
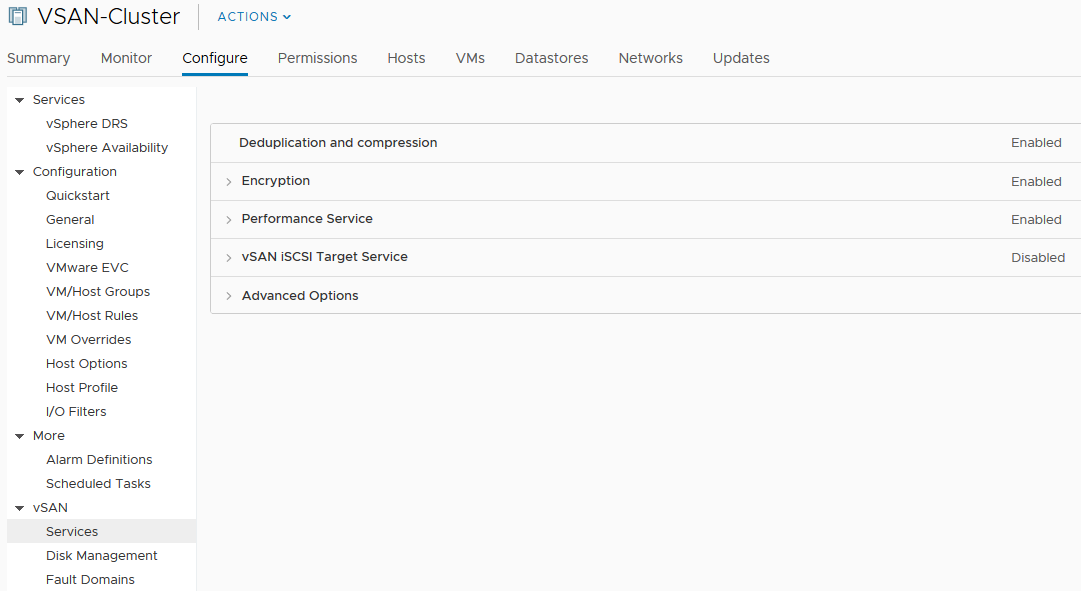
After configuring VM encryption in the previous step, enabling it for vSAN is a breeze. Since its configured on a per cluster basis, go to your vSAN Cluster > “Configure” > “vSAN” > “Services” and select “Edit”in the encryption section.
Enable “Encryption”, select the correct KMS cluster and of you go!
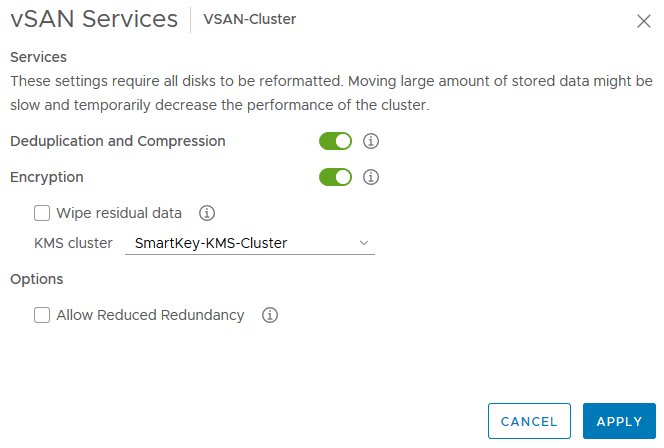
After encryption is enabled, a full vSAN disk format upgrade is performed in a rolling manner to encrypt all existing data.
The encryption / decryption workflow is a bit different for vSAN. First vCenter will request a KEK from the KMS and stores only the ID, not the key itself. Every host in the cluster will get a KEK from the KMS server and encrypts every capacity disk with a unique random generated DEK. The DEK is stored on disk together with the encrypted data.
When a host is rebooted the KEK is requested again from the KMS and is used to decrypt the on disk stored DEK. The DEK is used to mount the disk and decrypt its data.
To conclude
Using SmartKey to implement a proven and available KMS solution in combination with vSphere encryption worked like a charm. In hindsight it was more easy then I thought it would be.
Even if you don’t want to use the public internet for key exchange, SmartKey can be used. Bundled with Equinix Cloud Exchange Fabric a private circuit can be configured between SmartKey and your vCenter.
That being said, also take downsides and even pitfalls into account when encrypting your data. Take special care of the keys and make sure you have read and taken into account at least:
- VM and vSAN Encryption best practices, caveats and interoperability guides
- Determine, write down and test every failure scenario
- Train the Ops teams
- Determine back-up / replication software compatibility and recommendations
Useful links
Blogs
During the prep of this post I read some very relevant post from other community members which very well explain the concepts and essential troubleshooting steps.
General post
Key Manager Concepts and Topology Basics for VM and vSAN Encryption
vSAN 6.6 – Native Data-at-Rest Encryption
What’s new in vSphere 6.5: Security
VMware Encryption – VM or vSAN Encryption?
Troubleshooting posts
Troubleshooting vSAN Encryption and KMS Connectivity
Replacing vCenter with vSAN Encryption Enabled
Understanding vSAN Encryption – Booting when vCenter is Unavailable
Performance
VMware vSphere 6.5 Virtual Machine Encryption Performance
Documentation
See all the posts for the more in-depth knowledge.
Back-up encrypted VMs with Veeam
VM Encryption Interoperability
vSphere VM Encryption white paper
vSphere Licensing Comparisation Guide
vSAN Licensing Comparisation Guide
2 Comments
virtualNewbee · April 13, 2021 at 10:08 pm
Thank you for this write up. When using per-VM encryption, the keys created in the KMS are labeled as KMIP #######, where the latter part is a set of random ASCII characters. Is it OK to rename the key in Equinix without causing any disruptions in vCenter?
Daniël Zuthof · April 14, 2021 at 9:47 pm
Hi 👋. That’s a good one. I haven’t tested that. What would be your reason to rename them?